I’m not a developer, but I play one on TV work with them everyday. And…for years now, I’ve been hearing all about some dude named Jason. It is one of the countless technical acronyms I’ve had to Google.
JSON = JavaScript Object Notation. It is a way to describe your object in human readable name value pairs. Like this:
 {
  "firstName": "Elaine",
  "lastName": "Cowen",
  "age": 29,
  "address": {
    "streetAddress": "123 Main Street",
    "city": "Chicago",
    "state": "IL",
    "postalCode": "60643"
  },
  "phoneNumbers": [
    {
      "type": "home",
      "number": "312 555-1234"
    },
    {
      "type": "mobile",
      "number": "773 456-7890"
    }
  ]
}
JSON appears to be all the rage. The guys tell me that JSON is lighter weight than XML, more forgiving, and easier for a non-developer to read and understand. Lots of people are using this to represent their objects, even if they’re not using JavaScript.
So, when you want to load your data into InRule to run or test your business rules, you want to use the same object format that you’re already working with. And, when testing your rules, you want to get the updated data out of InRule in the same format you’re using in your integration.
The InRule Runtime SDK has always had support for loading and saving state from XML. Now, JSON can also be input and output from the SDK. No need to switch to XML just for us.
Here are a couple of examples:
Output JSON from an Entity:
using (RuleSession session = new RuleSession(ruleApp))
{
       Entity claim = session.CreateEntity("Claim");
       session.ApplyRules();
       string outputJson = claim.GetJson();
}
Input JSON into an Entity:
using (RuleSession session = new RuleSession(ruleApp))
{
       string inputJson = @"{
                              ""ClaimID"": 1,
                              ""ClaimNumber"": ""12345"",
                              ""Claimant1"": {
                                         ""FirstName"": ""Elaine"",
                                          ""LastName"": ""Cowen"",
                                          ""PhysicalAddress"": {
                                                ""StreetAddress"": ""123 Main Street"",
                                                ""City"": ""Chicago"",
                                                ""State"": ""IL"",
                                                ""Zip"": ""60643""
                                                                }
                                              }
                             }";
       Entity claim = session.CreateEntity("Claim", inputJson, EntityStateType.Json);
       session.ApplyRules();
}
In addition, new to InRule 5 (v5.0.6), we now have full irVerify support for JSON! Let’s review these additional options and workflow.
irVerify Ribbon buttons
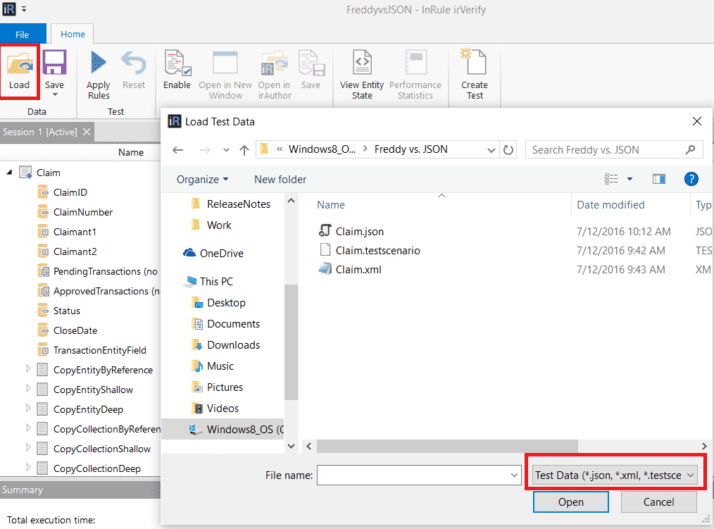
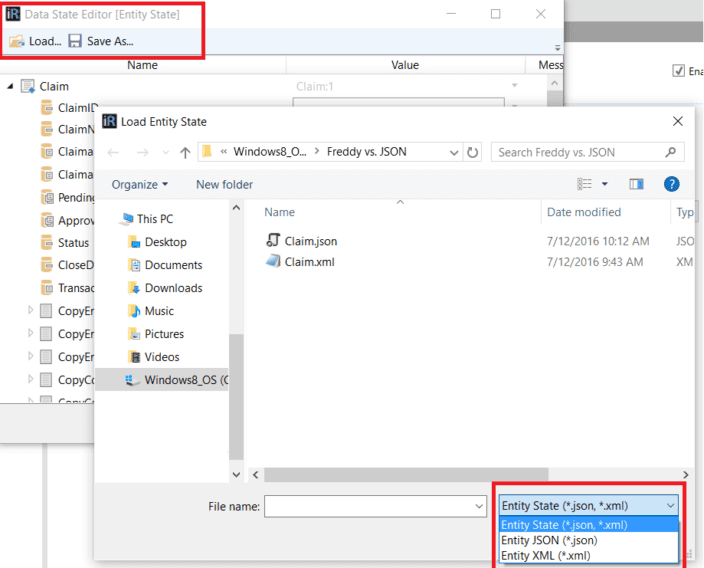
When loading test data state into irVerify, rather than selecting the data type right away, you now simply click the “Load” button and a file dialog searches for all supported file types – .json, .xml and .testscenario.
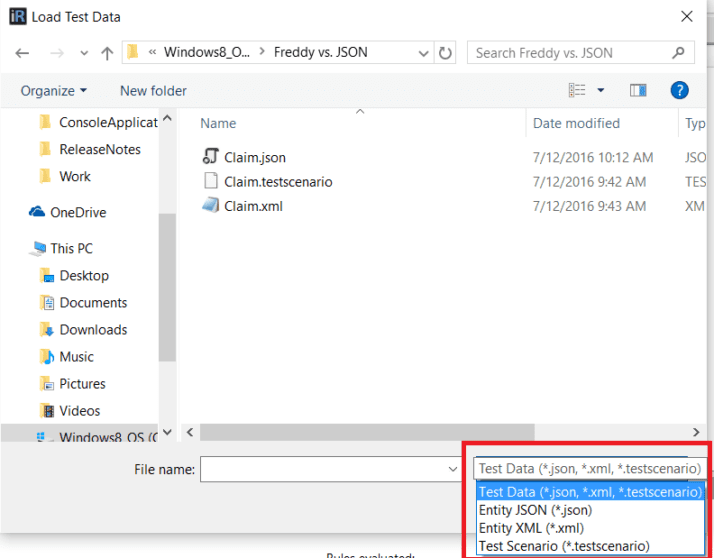
You can then choose to filter the list of files by selecting a specific file type from the pick list.
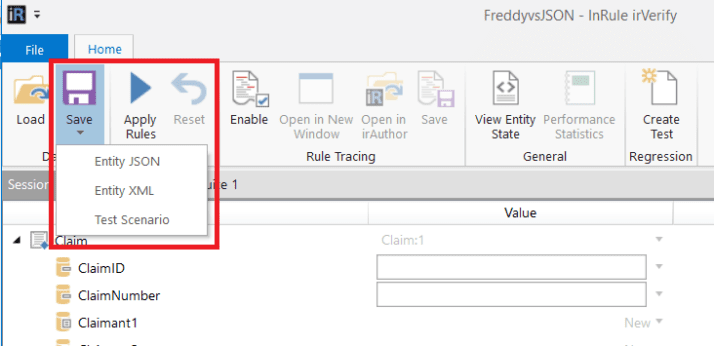
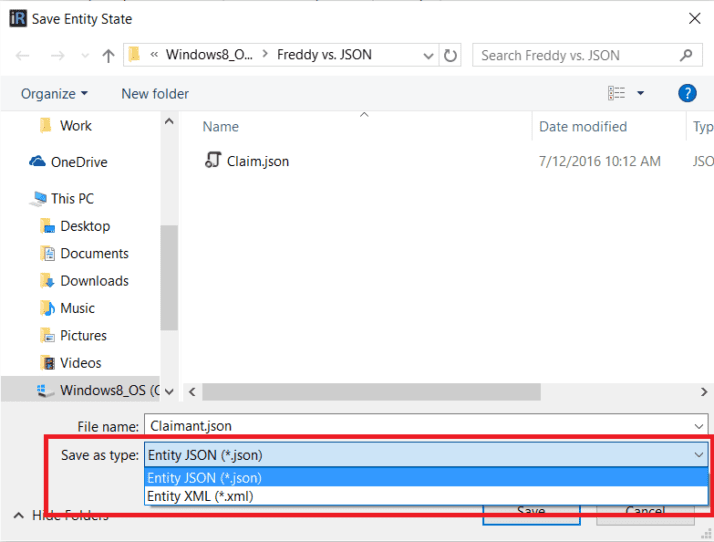
The Save menu also has an Entity JSON option.
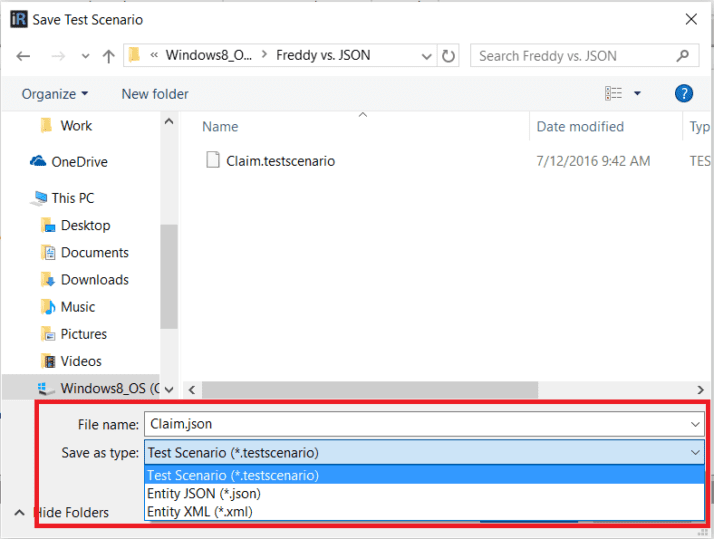
If you make a mistake when selecting the file type from the save menu, you can change it from the save dialog by selecting a different “Save as type”.
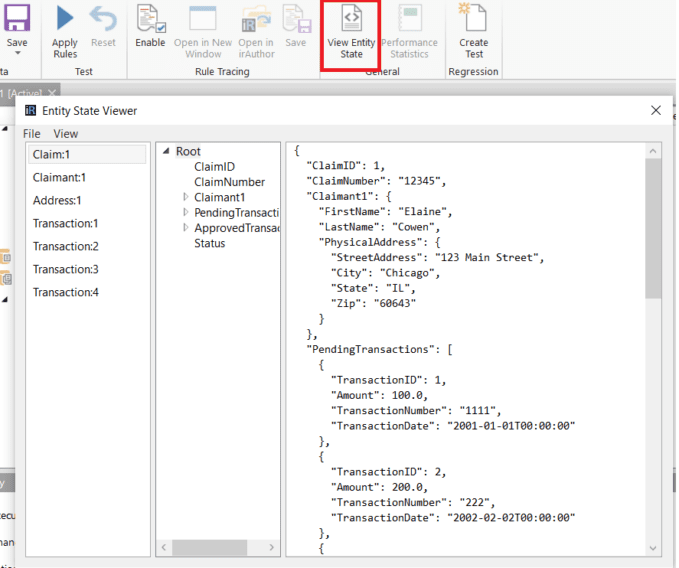
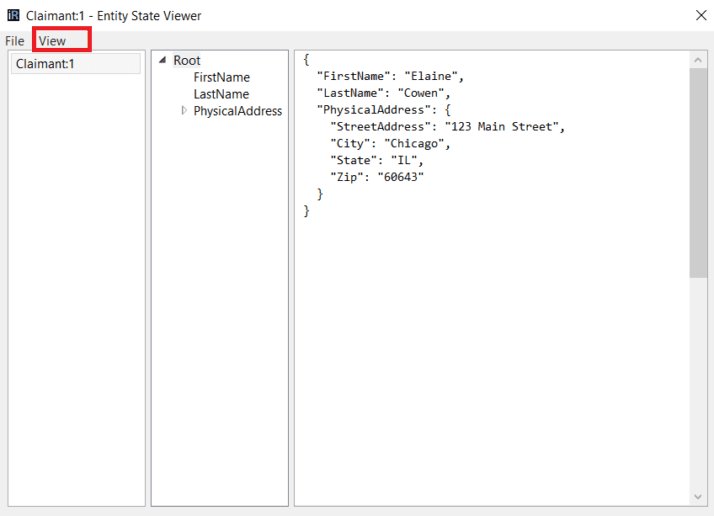
The “View XML” button on the ribbon has been changed to “View Entity State” and now defaults to display in JSON.
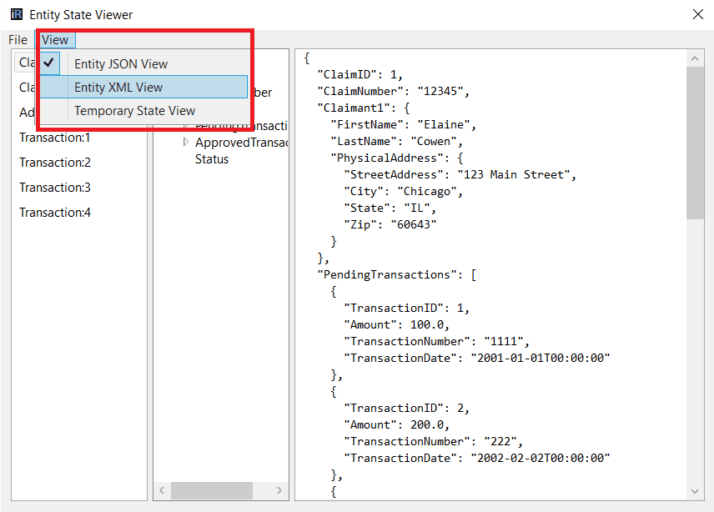
To change the data type for viewing, simply go to the View menu within the state viewer.
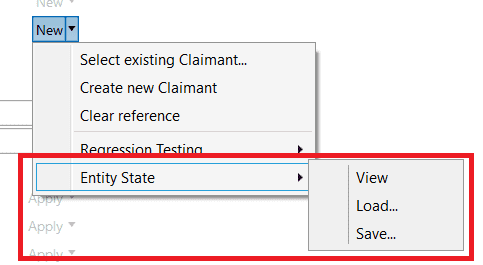
irVerify Entity Field menu
The drop down menu for entity fields has been changed from “XML” to “Entity State” and now supports loading and saving in both XML and JSON.
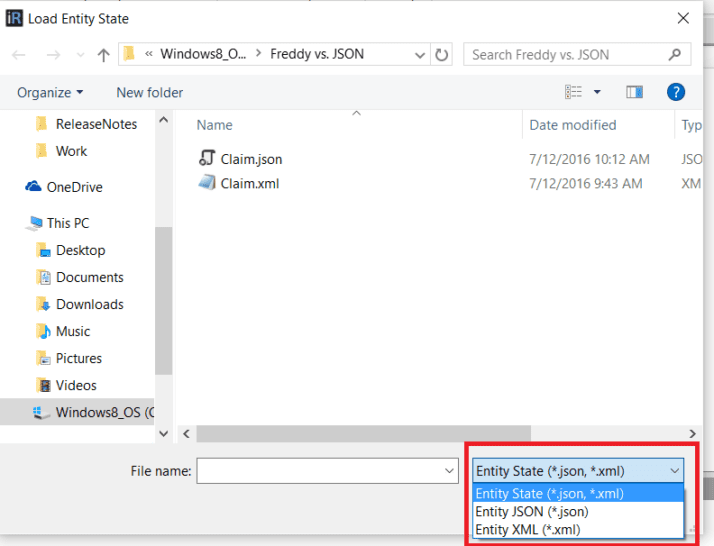
Similar to the load button from the ribbon, selecting “Load…” or “Save…” will open a file explorer dialog and the file type can be changed from the picklist.
The Load option will show both .json and .xml files by default, but the picklist can be changed to filter the available files to a specific file type.
The “Save…” option, will default to JSON, but the “Save as type” can be changed within the save dialog.
The “View” option will launch the Entity State Viewer which will default to displaying JSON, but can be changed to XML.
irVerify Entities panel
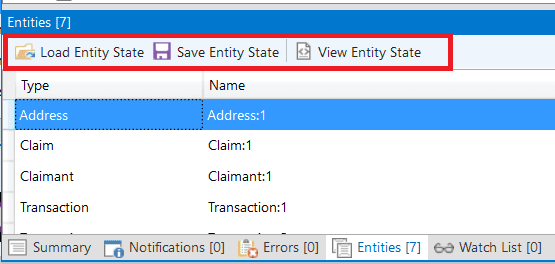
Did you think we forgot about the Entities panel? Works the same! You can now Load and Save both XML and JSON.
The “View” will launch the Entity State Viewer which will default to displaying JSON, but can be changed to XML.
irVerify – Regression Tester
Lastly, within the Regression Tester, anywhere Entity Data State can be selected, JSON is now supported in addition to XML, with JSON as the default.
In Summary
Don’t pick a different side in the Freddy XML vs. JSON fight just for us. Use what you’re comfortable with. We’ll support you.


